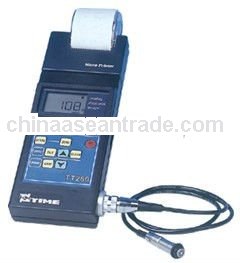
TT260 Coating Thickness Gauge
Features
- Two measuring methods: magnetic induction (F) and eddy current (N)6 types of probes are available for various applications
- 2 measurement modes: continuous / single
- 5 statistical ways: Mean values / Max. values / Min. values / testing numbers.(No.) / standard deviations (S.DeV)
- Memory up to 495 readings
- Direct testing mode and block statistics mode (APPL/BATCH)
- Direct print out of statistical values
- Dataview for connecting with PC is available
- Low battery indication
- 2 switch off modes: manual and auto
Specifications
Measuring range | Refer to the table below |
Probes available | |
Tolerance | |
Minimum resolution: | |
Measuring condition | |
Operation language | English |
Standards | DIN, ISO, ASTM,BS |
Calibration | Zero and foil calibration |
Statistics | Number of measurements, mean, standard deviation, |
Data memory | 495 readings |
Limits | Adjustable with alarm |
Interface | RS-232 |
Working temperature | 0-40°C |
power supply | Nicd rechargeable batteries 1.25V |
Dimensions | 270mm×86mm×47mm |
Weight | Approx. 530g |
Optional probes and technical specification
Probe model | F400 | F1 | F1/90º | F10 | N1 | CN02 | |||
Operating principle | Magnetic induction | Eddy current | |||||||
Measuring range (µm) | 0-400 | 0-1250 | 0-10000 | 0 to 1250 μm | 10~200 | ||||
Low range resolution (µm) | 0.1 | 0.1 | 10 | 0.1 | 1 | ||||
Accuracy | One-point calibration (µm) | ±(3%H+1) | ±(3%H+10) | ±(3%H+1.5) | ±(3%H+1) | ||||
Two-point calibration (µm) | ±[(1~3)H%+0.7] | ±[(1~3)H%+1] | ±[(1~3)%H+10] | ±[(1~3)%H+1.5] | - | ||||
Measuring conditions | Min curvature of the min area (mm) | Convex | 1 | 1.5 | Flatten | 10 | 3 | Flatten | |
Diameter of the min area (mm) | φ3 | φ7 | φ7 | φ40 | φ5 | φ7 | |||
Critical thickness of substrate (mm) | 0.2 | 0.5 | 0.5 | 2 | 0.3 | unlimited | |||


 Verified Company
 Shenyang Faith Trading Co., Ltd.

