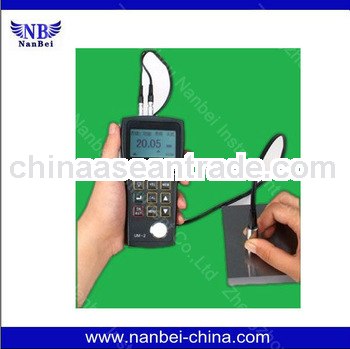
widely used for steel thickness gauge with ISO certificate
Product introduction:
Our plant development and production of the UM-1D ultrasonic thickness gauge ultrasonic pulse reflection principle according to the thickness measurement, when probe ultrasonic pulses emitted by the measured object reaches the interface material, the pulse is reflected back to the probe, accurate measurement by ultrasound wave propagation in the material time to determine the thickness of the material being tested.
Features:
1,Our factory development and production of UM-1D ultrasonic measuring instrument with a small, lightweight, simple, functional excellence.
2,Can be used with various double crystal probes in different sizes and frequencies.
3, Function of zero point calibration and two points calibration can correct the error of the system automatically.
4, With the given data of thickness, the sound velocity can be measured, so that the measurement accuracy can be improved.
5, Coupled with prompt, low voltage-tips on the screen.
6, EL backlight display function: for measurement in poor lighting environment.
7, Dump energy indicator function: to display the real time dump energy of the batteries.
8, Shutdown mode: manual and automatic shutdown features are helpful for battery saving.
9, Features of portable figure, high reliability, anti-vibration and anti-interference make it can be used in terrible operation environment.
Technical parameters:
Model | UM-1D | UM-1 | UM-2 | UM-2D | UM-3 | |
Operating principle | Standard mode: P-E (pulse-echo) method with dual-element probes Coating mode: E-E (echo-echo) method with dual-element probes | Pulse - echo mode | Standard mode: P-E (pulse-echo) method with dual-element probes Coating mode: E-E (echo-echo) method with dual-element probes | Interface waves ~ echo mode (normal mode) Echo - echo mode (precision mode) | ||
Probe zero adjustment | Selectable: 1-point calibration: normal measurement 2-point calibration: curve surface measurement or other special application with a high precision | |||||
V-path correction | Automatic V-path correction, compensating non-linearity duals | |||||
Measuring range | 0.8mm to 300mm in standard mode 3.0mm to 18.0mm in through coating mode Depending on probe, material and surface condition | 0.8 ~ 300mm Depending on probe, material and surface condition | 1.5 ~ 20mm (normal mode) 0.3 ~ 10mm (precision mode) | |||
Digital resolution | 0.1mm | 0.1mm 0.01Inches | 0.1mm,0.01mm 0.001inshes,0.01inches | Mm -0.001,0.01,0.1 Inches -0.0001,0.001,0.01 | ||
Units | Selectable: inch or mm | |||||
Display | 128×64 dot-matrix LCD screen ( 42mm×57mm) EL backlight and switchable contract ratio Digit height: 13.75mm | |||||
Operating language | English and Chinese | |||||
Measurement update rate | 4 Hz in standard measurement mode 25 Hz in MIN capture mode | |||||
Material velocity range | 1000 to 9999 m/s; 0.0394 to 0.3937 inch/µs | |||||
Power | Two 1.5V AA alkaline batteries Warning with low battery voltage | |||||
Operating time | Two 5 batteries, use the time up to 200 hours , depending on operating mode | |||||
Operating temperature | -10°C to +50°C Specification to -20°C on request | |||||
Automatic shutdown | 5 minutes off automatically after no operation | |||||
Size | 149mm×73mm×32mm (H×W×D) | |||||
Weight | 200g (including batteries) | |||||
Data logger capacity | Up to 500 readings can be divided into a maximum of 5 files (user-selectable) | |||||
Measuring error | ±0.1mm(up to 10mm) ±0.5%H+0.01(above 10mm) H is the height of the testing object | ± 0.005mm (up to 3mm) ± 0.05mm (up to 20mm) H is the height of the testing object | ||||
Repeatability | ±0.05mm | ±0.1mm | ±0.05mm | |||
Refresh frequency measurement | Conventional measurement 4Hz, 25Hz minimum scan time | |||||
Standard configuration | UM series gage Standard probe Instrument case Two alkaline batteries Coupling agent Operation Manual Certificate of quality Packing List | |||||
Optional accessories | Rubber jacket; wide selection of probes; calibration step test block; coupling agents, coupling agents temperature | |||||
Our factory also development and production of UM-5 color screen with A-scan feature allows users gauge can be seen directly on the screen, color ultrasound signal waveform (or A-scan), which need to verify whether the correct thickness reading is crucial occasions the. Many cases will lead to the wrong thickness readings or no readings, according to the waveform can easily find the problem, and then only on the waveform gain (GAIN), blanking (BLANKING), gate (GATE) to make appropriate adjustments to these three parameters, it is obtain the correct thickness readings.
We always put quality as the first consideration. So purchasing our product is your best choose!


 Verified Company
 Zhengzhou Nanbei Instrument Equipment Co., Ltd.

